
10 min read
How To Build A Kayak Rack For An RV (Your DIY Guide)
When you have an RV and you’re getting into kayaking setting up a rack for your kayaks can be a pain. Most have a hard time figuring out exactly which rack will fit and how to get started let alone making their own.
Well, transporting a kayak on your RV is possible. You just need to attach a kayak rack, and you’re good to go; however, this can be a bit costly. To help you save some money, I will walk you through some DIY methods on how to build a kayak rack for an RV, well cover some options below.
DIY Kayak Rack for Your RV (Option 1)
Most DIY camper kayak racks use a hitch mount cargo carrier as a rack. Most of these are designed to hook directly into your tow hitch and can hold hundreds of pounds which is enough for one or two kayaks that are stood up.
What You Need
- Hitch mount cargo carriers that come with a waterproof cargo bag
- Two ratchet straps
- a cargo net with a heavy-duty steel hitch stabilizer.
Also, select a carrier that can hold 500 or more pounds of cargo, such as camping gear or a kayak. (1)
Step #1: Assemble the Tray
After you purchase a tray, you may start assembling it. It will usually be 60 inches long, 20 inches wide, and 6 inches tall. Then, attach it to your RV’s hitch.
Step #2: Use Empty Milk Crates
Strap the empty milk crates to the cargo base and protect them with foam packing sheets. You can also get fancy and use proper tools to cut custom-sized holes in the tray and insert a bucket or other container into which the kayak ends will drop.
Step #3: Strap Your Kayaks Down
Make a vertical kayak rack out of the height of your vehicle. Mount your kayaks by standing them on end. Strap the top end of the ladder to the cargo tray and strap the bottom end to the ladder at the back. The kayak’s end will stabilize below the tray’s surface level.
Things to Consider
When storing your DIY kayak rack on the back of your RV, you should consider your vertical clearance as well as the total weight of the kayaks. Most kayaks weigh between 30 and 80 pounds, so their weight shouldn’t be an issue unless you plan on loading a lot of other gear on the rack as well. Its length determines the height of your kayak. For example, a twelve-footer could poke its nose over the top of your roof A/C unit, reducing your clearance. (2)
Here’s a learning guide on how you should properly store your kayak.
RELATED Best Kayak Roof Rack
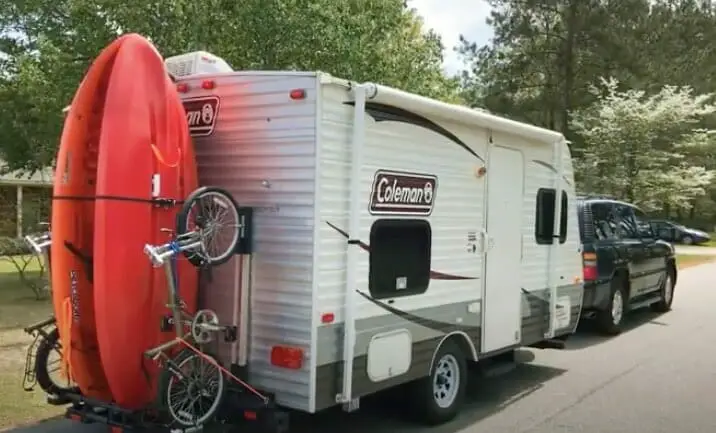
DIY Carrier Rack System (Option 2)
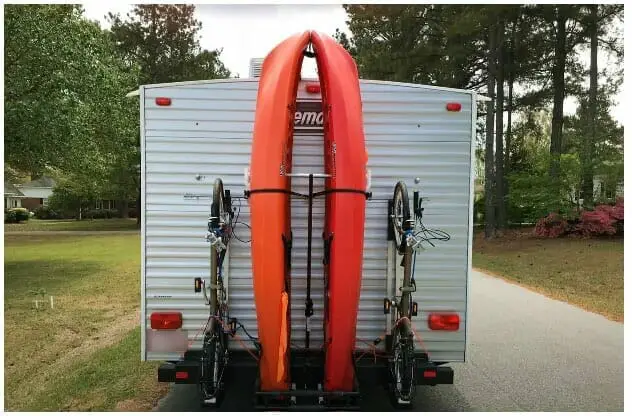
You could have a rack system designed for 8 feet kayaks and 20-inch folding bikes. However, if you have larger bikes and 10-foot or longer kayaks, such as 10-footers, you could easily scale it up by raising the camper attachment bar position and lengthening the bike rack pieces.
What You Need
For this method and design, you’ll need a carrier rack system which is composed of:
- Bumper sleeve
- Bike rack stanchions
- Camper back wall attach bar
- Kayak pads
- Bike rack pads
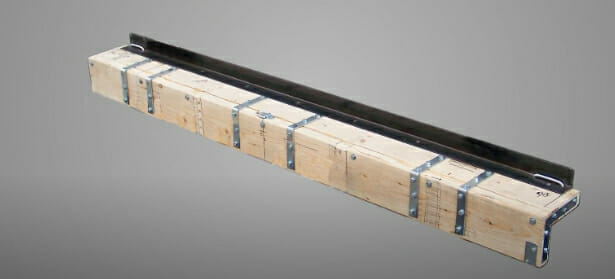
Step #1: Bumper Sleeve
Materials
- 2×2” steel angle iron 6 feet long
- 2” x 6” wood boards 6 feet and 4 inches long
- ⅜” x 4” x 7” shackle bolts (2 pieces)
Use the steel angle iron and wood boards to construct your bumper sleeve. To do it, glue and bolt it together into an “L” shape. Then, use the shackle bolts and insert them on each side of your bumper sleeve. You should insert it around the camper frame and not on your RV’s bumper.
Step #2: Kayak Pads
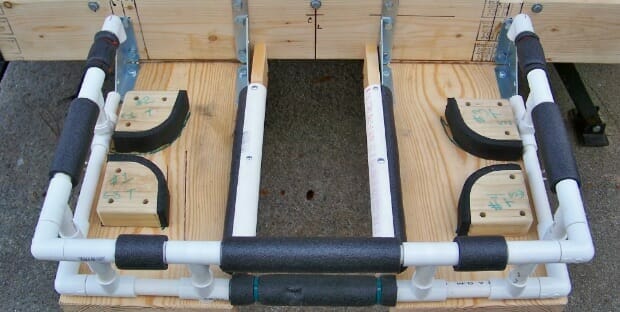
Materials
- 2” x 12” wood boards
- ¾” PVC tubing
Use the wood boards as the base of your kayaks. Make a customized hole on your kayak pads where you place your kayak’s end. Also, attach the PVC tubing around the pads. It will serve as a support for holding your kayaks to make them more stabilized when your RV is running. Then, glue and bolt your kayak pads to your bumper sleeve. Extend the length of its backs under the bumper and cradle it.
Step #3: Bike Rack Pads
Materials
- 2” x 6” wood boards
- 2” U-clamp
- 1” aluminum channel (2 pieces)
You’ll be needing two bike rack pads for each side. Therefore, you also need two sets of each material required. For the surface, use wood boards. Then, bolt the U-clamp with the aluminum channel on each side on the middle part of the surface. It will hold the back tire of your bike since you’ll position it vertically. After that, glue and bolt your bike rack pads to your bumper sleeve.
Step #4: Bike Rack Fixtures
Materials
- 2×4” wood
- 1-½ x 1-½’ aluminum L channel
- 2” U-clamp
- 1” aluminum channel (2 pieces)
You’ll also need two bike rack fixtures, the same as the bike rack pads. Use the wood for each bike rack fixture’s top and bottom part, and bolt it to each side of the aluminum L channel. Then, bolt it to each side of your bumper sleeve vertically. For the top part of each fixture, bolt the U-clamp with the aluminum channel on each side, the same as you did on the bike rack pads. It will then now hold your bike’s front tire, which will be positioned vertically. Then, glue and bolt it also to your bumper sleeve.
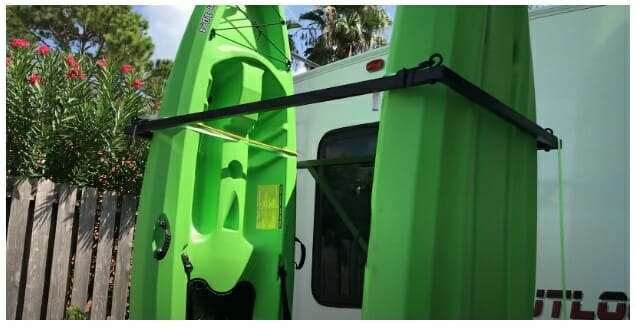
Step #5: Camper Back Wall Attach Bar
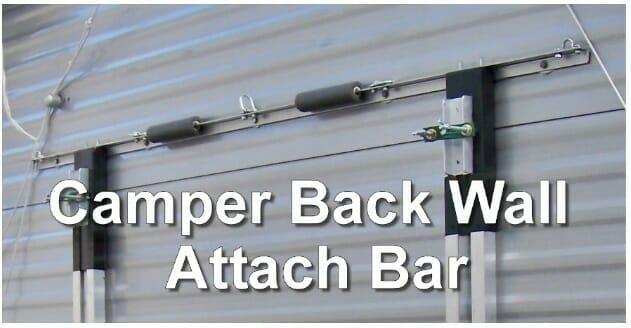
Materials
- 1” steel angle iron 6 feet long
- ¾” PVC pipe (2 pieces)
- Pin sets
- Anchor loop hold-downs (3 pieces)
At the back of your RV, attach the steel angle iron. To do it, drill five mounting holes at the wall and bolt it. Then, drill two sets of ¼” diameter clearance holes for pin sets to secure your bike rack fixtures. Next, cover the PVC pipe with foam pipe insulations and attach it to each side. It will serve as bumpers for the upper part of your rack. Then, mount three anchor loop hold-downs for strapping your kayaks. Here, you may read some tips on the essential kayak anchor guide so you’ll remain still.
Step #6: Kayak Connect-Hold Down Bar
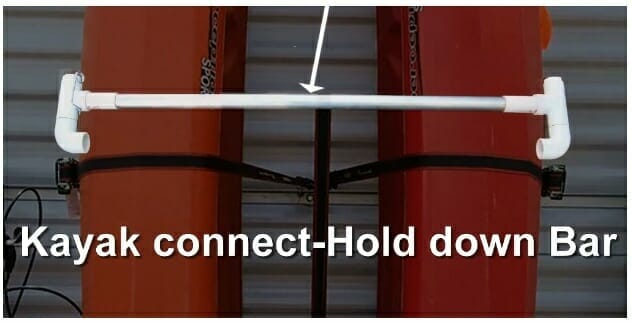
Materials
- ¾” PVC fittings
- ¾” 200-PSI PVC pipe (2 pieces
- ¾” EMT steel pipe
- Spring pin
To assemble it, attach the 200-PSI PVC pipe to each side of the EMT steel pipe. Then, attach the PVC fittings to each side of the 200-PSI PVC pipe. Its structure should have a removable connector/pin end for the other side and a fastened end for the other one. Then, place it at the top of your RV. Its purpose is to lock your two kayaks together.
Things to Note
Most camper bumpers are incapable of supporting much weight. And this method is intended to bear the majority of the weight on the camper frame. As a result, using it would be risky if the bumper was not reinforced by welding an additional channel.
Bonus: Carry Kayaks on Your RV’s Roof
While professionals recommend using a roof rack to transport your kayak, you can still transport it on the RV’s roof without one. It is the most cost-effective option aside from a DIY rack. All you need are pool noodles.
Step #1: Measurement is Key
Measure the length of your kayak against the length of your RV roof.
Step #2: Attach the Pool Noodles
After the measurement, place the noodles on either end of the roof. The pool noodles will function as a regular rack, so put them where a rack would generally go.
Step #3: Place Your Kayak
Position your kayak on the pool noodles and secure the ratchet straps on each end. Use as many pool noodles as possible to keep your kayak affixed to the roofs in high winds and when traveling at high speeds. In other words, the more pool noodles, the better!
FAQs
How much money is needed to build kayak racks?
There are several options for building a vertical kayak rack. Therefore, the cost you could incur to create one depends on your desired design and the materials you use. But, based on the options I have discussed, you could only spend 250-300 dollars which is less expensive than purchasing camper kayak racks in the market.
Is it good to mount your RV Racks on the roof?
Getting a roof-mounted rack is one of the most common methods of transporting your kayak to your RV. It is extremely simple to mount a rack on your RV or travel trailer, and you can install it yourself. However, it would be best if you fastened it properly and securely so that your kayak remains in place, especially when traveling at high speeds on busy roads such as freeways or highways.
Aside from that, an RV roof rack serves multiple purposes. You can use it to transport not only your kayak but also other camping equipment. It’s beneficial for transporting bulky items such as larger luggage and water containers.
Is it possible to carry two kayaks on your RV?
Yes, you can transport two kayaks to your RV. All you need is a rack that can hold two or more kayaks. If you intend to transport more than two kayaks on your RV, choose smaller and lighter kayaks. Also, kayak trailers are an excellent method of transporting two or more kayaks.
You can also transport your kayak inside of your RV. A 10-foot kayak, for example, will fit easily inside one of your RV’s rooms. You should be fine if you strap them with a ratchet strap!
Wrapping Up
When you build kayak racks, you can be as simple or as complex as you want. You can hook straps to your RV’s rear ladder, or you can weld uprights, overhangs, and other features to the cargo rack to suit your needs better. On the other hand, you could carry your kayaks and other containers on the roof of your RV.
There are plenty of ways to transport your kayak. And because RVing is a do-it-yourself hobby, the decision is entirely yours!
See the video below;
References
(1) camping – https://www.britannica.com/topic/camping
(2) A/C unit – https://home.howstuffworks.com/ac2.htm